In this exercise, you will learn to create templates and template parts for block themes.
Templates are your base files. The lesson starts with index.html. Next, you will add templates for single posts, pages, archives, and search results.
You will use template parts to organize and structure the theme to avoid repeating code. You will start with a site header and footer and combine them with the template files.
If you created an empty WordPress theme in the previous lesson, continue using it for this exercise. Or, you can download the theme from GitHub.
The examples in this lesson assumes that you are using WordPress 6.4 or newer.
Creating your first template parts
If your starter theme does not already include a folder called templates with an empty index.html file inside; please create them before continuing.
A template part is an HTML file, a custom post type (wp_template_part), and a block.
Sounds complicated? Think of them as blocks that display the content you have placed inside them. Template parts are not required but help developers structure the theme with reusable, smaller parts.
Inside the theme’s root folder, create a folder called parts. Please create the footer.html and header.html files inside this folder. WordPress will search this folder for valid files.
Next, add some content to the template parts so that you can identify them when you test the theme. You can add the site title and tagline blocks to header.html with the following block markup:
<!-- wp:site-title {"textAlign":"center"} /-->
<!-- wp:site-tagline {"textAlign":"center"} /-->
In footer.html, add the well-known footer credit text:
<!-- wp:paragraph {"align":"center"} -->
<p class="has-text-align-center">Proudly powered by
<a href="https://wordpress.org/">WordPress</a>.</p>
<!-- /wp:paragraph -->
Combining templates and template parts
You use the block markup for template part blocks to include them inside a template file.
Template parts are always self-closing because the content is inside the HTML files.
Open index.html inside the templates folder and add the two template parts:
<!-- wp:template-part {"slug":"header"} /-->
<!-- wp:template-part {"slug":"footer"} /-->
The value of the slug parameter is your file name without the file ending, so if your template part was called header-with-logo.html, you would use the code:
<!-- wp:template-part {"slug":"header-with-logo"} /-->header.html is the equivalent of header.php in classic themes.
You can also think of <!-- wp:template-part {"slug":"header"} /--> as the equivalent of get_header(); or a similar include, with one important exception: The block markup adds a wrapping HTML element.
Just like blocks, templates and template parts are self-containing. The opening tag and the closing tag must be in the same template. You can’t place an opening tag for a group block in a header template and close it in a footer template.
How to add a wrapper element and class names to template parts
The default HTML element for template parts is a <div>. You need to update the header and footer template parts to use the correct HTML elements. Here is how you can add the tagName attribute and transform the <div> to <header> and <footer>:
<!-- wp:template-part {"slug":"header","tagName":"header"} /-->
<!-- wp:template-part {"slug":"footer","tagName":"footer"} /-->
If you want to be able to identify and target the header and footer with CSS, add a custom CSS className:
<!-- wp:template-part {"slug":"header","tagName":"header","className":"site-header"} /-->
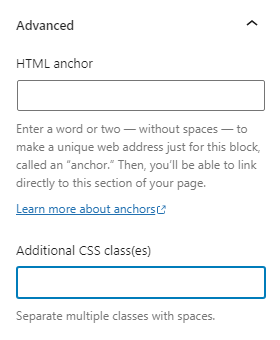
<!-- wp:template-part {"slug":"footer","tagName":"footer","className":"site-footer"} /-->The className attribute is the equivalent of adding the class in the “Additional CSS class(es)” field in the advanced panel in the block settings sidebar:
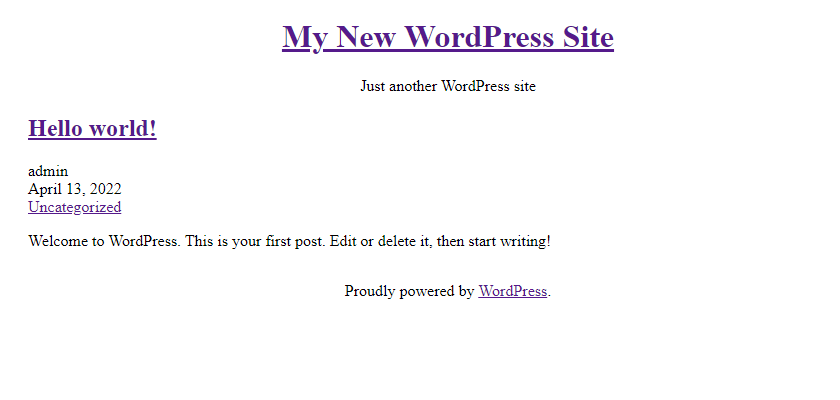
If you preview your website now, it should look something like this:

Adding the blog section
You will create the blog using a query loop and a post template block. But first, you need to add a <main> element as a wrapper for the list of blog posts. By including the <main> element you also enable the automatic skip link.
In index.html, between the two template parts, add a group block with the tagName attribute with the value main. Next, update the <div> to <main>:
<!-- wp:group {"tagName":"main","layout":{"type":"constrained"}} -->
<main class="wp-block-group">
</main>
<!-- /wp:group -->
✋ If you are wondering why there is no inner container <div> inside this group, WordPress has removed the inner container for themes that include a theme.json file.
✋ The layout type setting was updated in WordPress version 6.1.
There are three layout types:
- Constrained: The blocks inside the group are centered horizontally. The width of the blocks is the value you added to
contentSizeintheme.json. - Default: The blocks inside the group are left aligned and fill the width of the container. In other words, this block is basically unstyled.
- Flex: Used with the row and stack group block variations.
When the Gutenberg plugin is active, there is also an experimental Grid layout feature that you can try.
Query loop block
The query loop block has many advanced features. To create a basic blog, you can rely on the defaults: Display posts ordered by date. A query loop block without extra settings inherits the query from the current template. In other words, it displays different content depending on the context.
- On the index or home template, the query block displays posts from every category.
- In an archive, it shows items from the chosen post type or taxonomy (category or tag).
- On a search results page, it displays the search results.
When you manually add a query in the block editor, this is the equivalent of enabling the “Inherit query from template” setting:

✋ On the front page template and on custom page templates, you need to make sure that the “Inherit query from template” setting is toggled off, or nothing will show.
The post template
Each query block uses an inner block called a post template, a container block for post blocks like the title and content. WordPress passes data from the query to the post template and then repeats the blocks inside the post template for every post.
<!-- wp:query -->
<div class="wp-block-query">
<!-- wp:post-template -->

<!-- /wp:post-template -->
</div>
<!-- /wp:query -->
I want the example blog to display a featured image, title, author, and date above the excerpt. You can experiment with other post blocks as long as you place them inside the post template.
The title block (previously called post title) must be a link. Otherwise, visitors can not reach the individual posts from the blog. Including "isLink":true will add the correct link for each post inside the loop.
In the code example, I decided not to display the author avatar by setting showAvatar to false:
<!-- wp:post-template -->

<!-- wp:post-featured-image /-->
<!-- wp:post-title {"isLink":true} /-->
<!-- wp:post-author {"showAvatar":false} /-->
<!-- wp:post-date /-->
<!-- wp:post-excerpt /-->

<!-- /wp:post-template -->
Finally, I think I could improve this blog by showing the categories, and the block markup for displaying categories is:
<!-- wp:post-terms {"term":"category"} /-->You can use the post terms block to display any taxonomy terms; the category is only one variation.
<!-- wp:post-featured-image /-->
<!-- wp:post-title {"isLink":true} /-->
<!-- wp:post-author {"showAvatar":false} /-->
<!-- wp:post-date /-->
<!-- wp:post-terms {"term":"category"} /-->
<!-- wp:post-excerpt /-->
Pagination
You don’t want the blog to repeat the pagination for each post, so instead, place the pagination block inside the query but outside the post template:
<!-- wp:query -->
<div class="wp-block-query">
<!-- wp:post-template -->
...
<!-- /wp:post-template -->

<!-- wp:query-pagination -->
<div class="wp-block-query-pagination">
<!-- wp:query-pagination-previous /-->
<!-- wp:query-pagination-next /-->
</div>
<!-- /wp:query-pagination -->

</div>
<!-- /wp:query -->
The query pagination block can also display the number of pages and the current page. I have only included the next and previous page links in the example.
Your index.html file should now look like this:
<!-- wp:template-part {"slug":"header","tagName":"header","className":"site-header"} /-->
<!-- wp:group {"tagName":"main","layout":{"type":"constrained"}} -->
<main class="wp-block-group">
	<!-- wp:query -->
        <div class="wp-block-query">
        <!-- wp:post-template -->
	<!-- wp:post-featured-image /-->
	<!-- wp:post-title {"isLink":true} /-->
	<!-- wp:post-author {"showAvatar":false} /-->
	<!-- wp:post-date /-->
	<!-- wp:post-terms {"term":"category"} /-->
	<!-- wp:post-excerpt /-->
       <!-- /wp:post-template -->
	<!-- wp:query-pagination -->
	<div class="wp-block-query-pagination">
		<!-- wp:query-pagination-previous /-->
		<!-- wp:query-pagination-next /-->
	</div>
	<!-- /wp:query-pagination -->
        </div>
	<!-- /wp:query -->
</main>
<!-- /wp:group -->
<!-- wp:template-part {"slug":"footer","tagName":"footer","className":"site-footer"} /-->
The front of your website should look something like this:
Creating a single post template
I want to show slightly different things for pages and single posts. And to do this, I need to give each format its own block template, starting with the single post.
Save a copy of index.html as single.html inside the templates folder.
Of course, you only want to show the current post, so you need to remove the loop.
What you have left in single.html is the following code:
<!-- wp:template-part {"slug":"header","tagName":"header","className":"site-header"} /-->
<!-- wp:group {"tagName":"main","layout":{"type":"constrained"}} -->
<main class="wp-block-group">
	<!-- wp:post-featured-image /-->
	<!-- wp:post-title /-->
	<!-- wp:post-author {"showAvatar":false} /-->
	<!-- wp:post-date /-->
	<!-- wp:post-terms {"term":"category"} /-->
	<!-- wp:post-excerpt /-->
</main>
<!-- /wp:group -->
<!-- wp:template-part {"slug":"footer","tagName":"footer","className":"site-footer"} /-->
✋ Since this is a single post, I also removed the isLink attribute from the post title.
To show the full content, replace <!-- wp:post-excerpt /--> with <!-- wp:post-content /-->:
<!-- wp:post-featured-image /-->
<!-- wp:post-title /-->
<!-- wp:post-author {"showAvatar":false} /-->
<!-- wp:post-date /-->
<!-- wp:post-terms {"term":"category"} /-->
<!-- wp:post-content /-->
<!-- wp:post-content /--> Is the equivalent of the_content() in a classic PHP-based theme.
You can show tags using the post tags variation of the post terms block. In the example, I have added the tags below the content:<!-- wp:post-terms {"term":"post_tag"} /-->
If you want to add some extra spacing, you can achieve this by adding padding, margin, or spacer blocks between the content and the post meta information:
<!-- wp:post-featured-image /-->
<!-- wp:post-title /-->
<!-- wp:post-author {"showAvatar":false} /-->
<!-- wp:post-date /-->
<!-- wp:post-terms {"term":"category"} /-->
<!-- wp:spacer {"height":"40px"} -->
<div style="height:40px" aria-hidden="true" class="wp-block-spacer"></div>
<!-- /wp:spacer -->
<!-- wp:post-content /-->
<!-- wp:spacer {"height":"40px"} -->
<div style="height:40px" aria-hidden="true" class="wp-block-spacer"></div>
<!-- /wp:spacer -->
<!-- wp:post-terms {"term":"post_tag"} /-->
<!-- wp:spacer {"height":"40px"} -->
<div style="height:40px" aria-hidden="true" class="wp-block-spacer"></div>
<!-- /wp:spacer -->
Adding a comments area
The comments block is set up the same way as the query loop block you used to display your blog posts. It fetches the comments for the current post or page and uses a comment template block as a container for the inner blocks. The inner blocks are:
- Avatar
- Comment author name
- Comment date
- Comment edit link
- Comment content
- Comment reply link
In addition, there is a comments pagination block and a comments form block.
I suggest creating a comments area below the content, inside the <main> element, by adding a heading followed by the comments block.
<!-- wp:spacer {"height":"40px"} -->
<div style="height:40px" aria-hidden="true" class="wp-block-spacer"></div>
<!-- /wp:spacer -->
<!-- wp:heading -->
<h2 class="wp-block-heading">Comments</h2>
<!-- /wp:heading -->
Comments block
The markup for the comment blocks is slightly more advanced than what I have covered so far because it includes several nested blocks. — If you are not used to reading block markup, it is easy to feel overwhelmed and lost when you try to locate where a block starts and ends.
I recommend that you start by adding the comments block in the WordPress block editor and then copy and paste the code into the HTML template file in your code editor.
Let me walk you through the default inner blocks: First, you have the comments, which is the parent block, the comments title, and the comment template:
<!-- wp:comments -->
<div class="wp-block-comments">
<!-- wp:comments-title /-->
<!-- wp:comment-template -->

<!-- /wp:comment-template -->
</div>
<!-- /wp:comments -->
Comments title
The comments title block displays the number of comments on a post or page. Example: 2 Responses to “Hello World”.
Comment template
The comment template uses a columns block to display the comment author’s avatar next to the comment, horizontally. The leftmost column has a width attribute set to 40px to match the width of the avatar:
<!-- wp:comment-template -->
<!-- wp:columns -->
<div class="wp-block-columns">
<!-- wp:column {"width":"40px"} -->
<div class="wp-block-column" style="flex-basis:40px">
<!-- wp:avatar {"size":40,"style":{"border":{"radius":"20px"}}} /-->
</div>
<!-- /wp:column -->
<!-- wp:column -->
<div class="wp-block-column">
</div>
<!-- /wp:column -->
</div>
<!-- /wp:columns -->
<!-- /wp:comment-template -->
The second column does not have a width set, and it will use up the remaining space:
<!-- wp:comment-template -->
<!-- wp:columns -->
<div class="wp-block-columns">
<!-- wp:column {"width":"40px"} -->
<div class="wp-block-column" style="flex-basis:40px">
<!-- wp:avatar {"size":40,"style":{"border":{"radius":"20px"}}} /-->
</div>
<!-- /wp:column -->
<!-- wp:column -->
<div class="wp-block-column">
<!-- wp:comment-author-name /-->
<!-- wp:comment-content /-->
<!-- wp:comment-reply-link /-->
</div>
<!-- /wp:column -->
</div>
<!-- /wp:columns -->
<!-- /wp:comment-template -->
The comment date and edit link are placed inside a group block with a row variation, placing them side by side:
<!-- wp:comment-template -->
<!-- wp:columns -->
<div class="wp-block-columns">
<!-- wp:column {"width":"40px"} -->
<div class="wp-block-column" style="flex-basis:40px">
<!-- wp:avatar {"size":40,"style":{"border":{"radius":"20px"}}} /-->
</div>
<!-- /wp:column -->
<!-- wp:column -->
<div class="wp-block-column">
<!-- wp:comment-author-name /-->
<!-- wp:group {"style":{"spacing":{"margin":{"top":"0px","bottom":"0px"}}},"layout":{"type":"flex"}} -->
<div class="wp-block-group" style="margin-top:0px;margin-bottom:0px">
<!-- wp:comment-date /-->
<!-- wp:comment-edit-link /-->
</div>
<!-- /wp:group -->
<!-- wp:comment-content /-->
<!-- wp:comment-reply-link /-->
</div>
<!-- /wp:column -->
</div>
<!-- /wp:columns -->
<!-- /wp:comment-template -->
You can identify a row by the flex layout setting "layout":{"type":"flex"} and the absence of orientation: <!-- wp:group {"layout":{"type":"flex"}} -->
A group block with both a flex layout and a vertical orientation is called a stack:<!-- wp:group {"layout":{"type":"flex","orientation":"vertical"}} -->
Comments pagination
Like the post pagination, the comments pagination block is inside the comments but outside the comment template. — I placed it below the comments, but if you prefer, you can place it above the comments, or why not in both positions?
<!-- wp:comments -->
<div class="wp-block-comments">
<!-- wp:comment-template -->
<!-- wp:columns -->
<div class="wp-block-columns">
<!-- wp:column {"width":"40px"} -->
<div class="wp-block-column" style="flex-basis:40px">
<!-- wp:avatar {"size":40,"style":{"border":{"radius":"20px"}}} /-->
</div>
<!-- /wp:column -->
<!-- wp:column -->
<div class="wp-block-column">
<!-- wp:comment-author-name /-->
<!-- wp:group {"style":{"spacing":{"margin":{"top":"0px","bottom":"0px"}}},"layout":{"type":"flex"}} -->
<div class="wp-block-group" style="margin-top:0px;margin-bottom:0px">
<!-- wp:comment-date /-->
<!-- wp:comment-edit-link /-->
</div>
<!-- /wp:group -->
<!-- wp:comment-content /-->
<!-- wp:comment-reply-link /-->
</div>
<!-- /wp:column -->
</div>
<!-- /wp:columns -->
<!-- /wp:comment-template -->
<!-- wp:comments-pagination -->
<!-- wp:comments-pagination-previous /-->
<!-- wp:comments-pagination-numbers /-->
<!-- wp:comments-pagination-next /-->
<!-- /wp:comments-pagination -->
</div>
<!-- /wp:comments -->
Comments form
Our comments area is still missing its comments form. The comments form block is a single block without options to edit the form fields.
The comments form is only visible on the front of your website if comments are enabled.
The block markup for adding the comments form is:
<!-- wp:post-comments-form /-->Next and previous post navigation
The post navigation link block adds a link to the next post, and the link to the previous post is a block variation. If there is no next or previous post to link to, then the block is not visible on the front of the website. The markup for the two block variations is:
<!-- wp:post-navigation-link {"type":"previous"} /-->
<!-- wp:post-navigation-link /-->
Creating the single page template
I recommend that you create the block template for single pages by saving a copy of single.html as page.html inside the templates folder.
Next, remove the unsupported blocks: post navigation, category, and tags.
— I also decided to remove the date, author, and comments, But this is a personal choice, and you can choose which blocks to include.
<!-- wp:template-part {"slug":"header","tagName":"header","className":"site-header"} /-->
<!-- wp:group {"tagName":"main","layout":{"type":"constrained"}} -->
<main class="wp-block-group">
	<!-- wp:post-featured-image /-->
	<!-- wp:post-title /-->
	<!-- wp:spacer {"height":"40px"} -->
	<div style="height:40px" aria-hidden="true" class="wp-block-spacer"></div>
	<!-- /wp:spacer -->
	<!-- wp:post-content /-->
	<!-- wp:spacer {"height":100} -->
	<div style="height:100px" aria-hidden="true" class="wp-block-spacer"></div>
	<!-- /wp:spacer -->
</main>
<!-- /wp:group -->
<!-- wp:template-part {"slug":"footer","tagName":"footer","className":"site-footer"} /-->
Archive templates
You will create a basic archive page in this part of the exercise. You can create an archive.html file used for all taxonomies or combine it with different templates for categories (category.html) or tags (tag.html).
If you want to create a template for a specific category, use the file name category-{slug of the category}.html.
If you don’t include the archive block templates in your theme, WordPress will use index.html, and your website will still show the correct content. The reason why I am suggesting that you create separate templates is to allow for customization and to display an archive title.
Open the index.html file in your code editor and save a copy of the file as archive.html.
In your archive.html file, add an archive title, a variation of the query title block, above the query:
<!-- wp:query-title {"type":"archive"} /-->Categories, tags, and other taxonomies can optionally have a description. To display the description, you can use the term description block:
<!-- wp:term-description /-->The full code of the archive.html file is now:
<!-- wp:template-part {"slug":"header","tagName":"header","className":"site-header"} /-->
<!-- wp:group {"tagName":"main","layout":{"type":"constrained"}} -->
<main class="wp-block-group">
        <!-- wp:query-title {"type":"archive"} /-->
	<!-- wp:term-description /-->
	<!-- wp:query -->
        <div class="wp-block-query">
	<!-- wp:post-template -->
	<!-- wp:post-featured-image /-->
	<!-- wp:post-title {"isLink":true} /-->
	<!-- wp:post-author {"showAvatar":false} /-->
	<!-- wp:post-date /-->
	<!-- wp:post-terms {"term":"category"} /-->
	<!-- wp:post-excerpt /-->
	<!-- /wp:post-template -->
	<!-- wp:query-pagination -->
	<div class="wp-block-query-pagination">
		<!-- wp:query-pagination-previous /-->
		<!-- wp:query-pagination-next /-->
	</div>
	<!-- /wp:query-pagination -->
        </div>
	<!-- /wp:query -->
</main>
<!-- /wp:group -->
<!-- wp:template-part {"slug":"footer","tagName":"footer","className":"site-footer" /-->
Customizing the search results page
With the addition of the ”no results” block in Gutenberg version 12.9, you can finally customize the search results page to display a message instead of a blank page when there are no search results. The no results block is in an early, simplified version, and I hope to continue working on improving it. Like the post and comment template, it is used inside a query and is a container block where you place other blocks.
Copy index.html and save it as search.html inside the templates folder.
Optionally, add a search results title block above the query to show users they are on the search page. This block is a variation of the query title and is available from WordPress version 6.1. “Level: 2” means the heading level two is used (H2):
<!-- wp:query-title {"type":"search","level":2} /-->WordPress shows the blocks inside the no results block instead of the post template, so it matters less where you position it as long as it is inside the query:
<!-- wp:template-part {"slug":"header","tagName":"header","className":"site-header"} /-->
<!-- wp:group {"tagName":"main","layout":{"type":"constrained"}} -->
<main class="wp-block-group">
	<!-- wp:query-title {"type":"search","level":2} /-->
	<!-- wp:query -->
	<div class="wp-block-query">
	<!-- wp:post-template -->
		<!-- wp:post-featured-image /-->
		<!-- wp:post-title {"isLink":true} /-->
		<!-- wp:post-author {"showAvatar":false} /-->
		<!-- wp:post-date /-->
		<!-- wp:post-terms {"term":"category"} /-->
		<!-- wp:post-excerpt /-->
	<!-- /wp:post-template -->
	<!-- wp:query-pagination -->
	<div class="wp-block-query-pagination">
		<!-- wp:query-pagination-previous /-->
		<!-- wp:query-pagination-next /-->
	</div>
	<!-- /wp:query-pagination -->
	<!-- wp:query-no-results -->

	<!-- /wp:query-no-results -->
	</div>
	<!-- /wp:query -->
</main>
<!-- /wp:group -->
<!-- wp:template-part {"slug":"footer","tagName":"footer","className":"site-footer"} /-->
You can add a basic message, a search form, a list of the latest posts, or even use a second query:
<!-- wp:query-no-results -->
<!-- wp:heading {"textAlign":"left","level":3} -->
<h3 class="wp-block-heading has-text-align-left">No results found</h3>
<!-- /wp:heading -->
<!-- wp:paragraph {"align":"left"} -->
<p class="has-text-align-left">Sorry, but nothing matched your search terms. Please try again with some different keywords.</p>
<!-- /wp:paragraph -->
<!-- wp:spacer {"height":"40px"} -->
<div style="height:40px" aria-hidden="true" class="wp-block-spacer"></div>
<!-- /wp:spacer -->
<!-- wp:search {"label":"Search","showLabel":false,"buttonText":"Search"} /-->
<!-- wp:spacer {"height":"40px"} -->
<div style="height:40px" aria-hidden="true" class="wp-block-spacer"></div>
<!-- /wp:spacer -->
<!-- wp:heading {"level":3} -->
<h3 class="wp-block-heading">Looking for a specific topic?</h3>
<!-- /wp:heading -->
<!-- wp:categories /-->
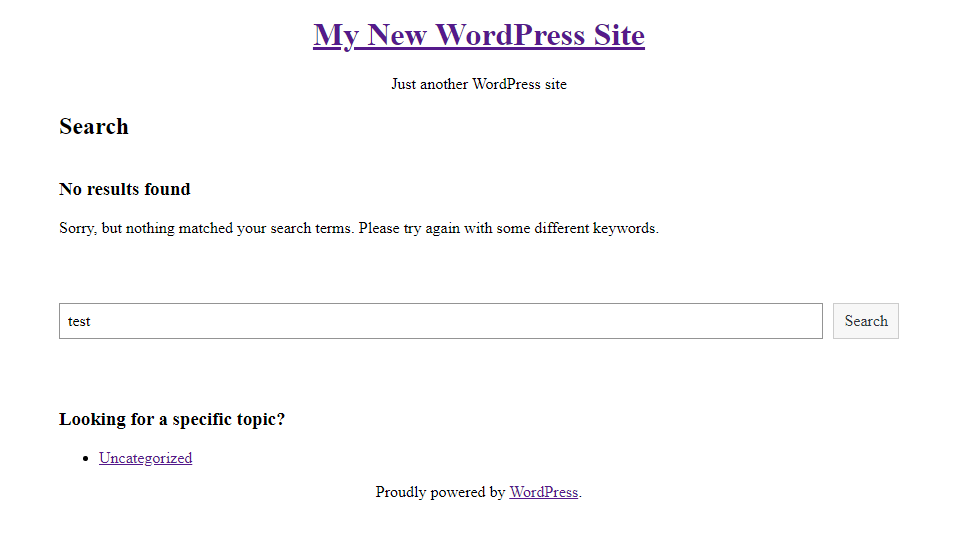
<!-- /wp:query-no-results -->Front view of the search results page:
Next steps
You have probably already thought of some ways to improve these basic templates.
For practice, move the comments area to a template part and include it in the appropriate template.